<<Previous | Next>>

Page 6 - Welding patches and some alloy rims

Luckily it seems that my good friend Zeljko will borrow me very soon his brand new MIG welder - that's excellent news that I waited a long, long time - it's the only stuff that I really need to finish chassis.

But nevertheless, I need to do all the stuff before, like removing rotten or damaged metal pieces and placing new patches instead. Good thing for me is that there are only few minor rotten places that will be easy replaced.


Again I must say that I am long way from car body expert, more car body enthusiast, and this is no restoration project where everything must be exactly to the specs - I use combination of my experience mixed with tons of great informations from the net.

OK, 
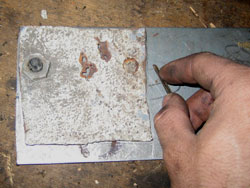
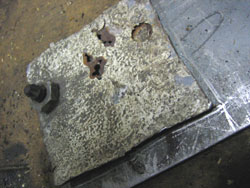
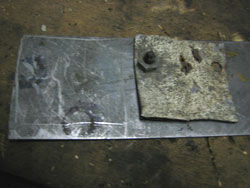
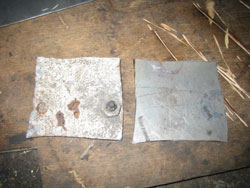
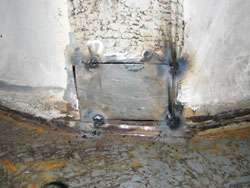
so first thing to do is to see how much metal was rotten and to find solid metal around , then I cut bad metal in rectangle shape, as this is logicaly easiest shape to deal with...

... After cutting damaged panel, first I flatten it with hammer just to be sure that it's straight, then I placed it on some fresh new metal sheet of about the same thickness, and with some sharp stuff mark exact shape...

...then I make another mark, paralel to first but with 2mm offset - this is because I must include grinding disc thickness and to have some material as reserve for final adjusting the shape...


...it looks like this after final drawing, now it's time for grinder...

...this is new panel - note that I left quite a few material left for further grinding...

After some checking and grinding, I get almost exact shape...

...now it's the time to see if everything fits - if fits, then I will tack welded in place...

...I tack welded new panel, with minimal current to minimise burn through. I could make tighter fit, but this is weldable with MIG machine - remember I'm not doing restoration project - function is first...

On rear right strut I replace almost exact panel on exact same place - it seems that's favourite place for rusting on Yugo.

After welding patches it's time to check rear roll bar joint to struts - I already mentioned before that my roll bar was bought second hand and that was lightly bent, so I cleverly must use little imagination for correct placing rear welding points - I use hydraulic jack for adjusting pipe - it needed only few cm's, and that pipe can't be bent manualy for few cm's believe me , no way my friend ;-) .

But with little help of cheap hydraulic jack it can be done very elegantly and it makes precise alignement very easy - pic will tell you all...

I wanted badly to make widened steel wheels, but I've managed to get some alloy five spoke wheels cheaply - wheels are 6J x 14" and unfortunately 4x100mmm bolt patern. But it could be done with some excentric studs.

I like simple design like this very much...

Without spacers, wheels fit nicely with edge just slightly inside widened fenders...that wheels could look nicely wrapped with 195/45/14" Toyo tires ...


Front view - I need to say that wheels will be placed 20mm out because I must put aluminum spacers that I luckily got with wheels - without them, inner wheel edge is rubbing suspension.

Remember triangular reinforcement? This is welded joint after little dressing , now it's completely finished, I only need to weld some kind of metal " box" around, so exhaust gases can't pass through firewall.
<<Previous | Next>>